So here are the rest of the photos of the bride's bouquet, bouts and corsages.
Bride's bouquet
Groom's bout
Fathers' bouts
Mothers' corsages
Groomsmen's bouts
The toss bouquet
Saturday, July 24, 2010
Photos of bridesmaids' bouquets
Okay! So here are the promised photos of the bouquets and bouts!
Step one: Gather all the flowers.
Step 2: Remove the leaves and attach to floral wire.
Step 3: Cut off the lower set of leaves from the roses.
Step 4: Cut stems to desired length.
Step 5: Compose bouquet and wrap stems in floral tape.
Step 6: Fold down a corner of the ivory ribbon and wrap stems. Tape to keep in place.
Step 7: Voila! Finished!
Step one: Gather all the flowers.
Step 2: Remove the leaves and attach to floral wire.
Step 3: Cut off the lower set of leaves from the roses.
Step 4: Cut stems to desired length.
Step 5: Compose bouquet and wrap stems in floral tape.
Step 6: Fold down a corner of the ivory ribbon and wrap stems. Tape to keep in place.
Step 7: Voila! Finished!
Friday, July 23, 2010
The veil
A couple of weeks ago, I finished making my veil. While trying it on in front of the mirror, I realized that I didn't like it. It was too poofy! I went online and bought some more tulle to make another veil, thinking this is going to suck because it's more work!
Then, the seamstress came to do my second fitting. I tried my veil on with it and the seamstress thought the amount of poof fits nicely with the shape of the dress. So then I felt better. Lol! Well, I admit that I welcomed her saying that cause it means I don't have to make another one! I am my own worst critic sometimes.
Again, I promise pictures of the veil will be posted soon. Actually, I'm hoping to post all the promised photos this weekend.
Then, the seamstress came to do my second fitting. I tried my veil on with it and the seamstress thought the amount of poof fits nicely with the shape of the dress. So then I felt better. Lol! Well, I admit that I welcomed her saying that cause it means I don't have to make another one! I am my own worst critic sometimes.
Again, I promise pictures of the veil will be posted soon. Actually, I'm hoping to post all the promised photos this weekend.
Finished with the flowers... mostly.
I didn't have much to do so last night work ended earlier than the previous night's. I made two corsages and one bout. It was tricky figuring out how to do the corsages because I didn't really like how the stems stuck out. I tried to finagle it so the ribbon would cover the stems, but then the flowers were a bit off kilter when tied onto the wrist.
In the end, I resorted to my trusty hot glue gun! After attaching all the daisy blossoms to floral wire and then taping them together, I pulled the lavender rose head off its stem and hot glued it to the V in the daisy stems. The lavender rose head was big enough to cover the daisy stems and I didn't need any additional hydrangea blossoms to cover up any big gaps between the flowers.
The next step was finding a way to attach the flowers to the 2 inches wide navy blue ribbon. I supposed I could have used elastic or one of those snazzy beaded corsage bracelets, but I had ribbon, which is cheap, low-tech and just as pretty. Lol! So since my hot glue gun was still pretty heated up, I just hot glued the flowers to the ribbon. I know it creates a hard spot in the ribbon, but after trying it on, it wasn't noticeable and was still pretty comfortable. I thought about pulling the wire out of the ribbon, as it was a wired ribbon, but the wire was so thin and fine, I didn't find it uncomfortable and so therefore, that extra step was unnecessary.
Now the last thing I have to do is to make a toss bouquet. I don't have anymore lotuses for the toss bouquet, so I'm thinking of just making a bigger bridesmaid bouquet. I suppose I can add in the remaining wired feathers to differentiate the bridesmaid bouquet from the toss bouquet. I haven't fully decided yet. I'm still trying to coast on the fact that I'm mostly done now. Lol!
In the end, I resorted to my trusty hot glue gun! After attaching all the daisy blossoms to floral wire and then taping them together, I pulled the lavender rose head off its stem and hot glued it to the V in the daisy stems. The lavender rose head was big enough to cover the daisy stems and I didn't need any additional hydrangea blossoms to cover up any big gaps between the flowers.
The next step was finding a way to attach the flowers to the 2 inches wide navy blue ribbon. I supposed I could have used elastic or one of those snazzy beaded corsage bracelets, but I had ribbon, which is cheap, low-tech and just as pretty. Lol! So since my hot glue gun was still pretty heated up, I just hot glued the flowers to the ribbon. I know it creates a hard spot in the ribbon, but after trying it on, it wasn't noticeable and was still pretty comfortable. I thought about pulling the wire out of the ribbon, as it was a wired ribbon, but the wire was so thin and fine, I didn't find it uncomfortable and so therefore, that extra step was unnecessary.
Now the last thing I have to do is to make a toss bouquet. I don't have anymore lotuses for the toss bouquet, so I'm thinking of just making a bigger bridesmaid bouquet. I suppose I can add in the remaining wired feathers to differentiate the bridesmaid bouquet from the toss bouquet. I haven't fully decided yet. I'm still trying to coast on the fact that I'm mostly done now. Lol!
Thursday, July 22, 2010
Almost done with the flowers!
So I had all the flowers and other floral supplies ready in the apartment, just waiting to be put together. I waited and waited, first playing with this combination and then that combination. Eventually, I decided I just had to get them done already! So I did a bunch last night.
The absolute hardest part was cutting the stems. I had a wire cutter, but it was difficult to use on the really thick wired stems. I had to draft the help of my fiance in the end, but I did most of them myself. All in all, I think they turned out very nicely. I finished the bridesmaids' bouquets, my bouquet, the groom's bout, the groomsmen's bouts and my father's bout. I still have to do one more bout and the corsages for our moms. So I'm mostly done with the flowers. I thought about also doing corsages and bouts for our siblings, but my fingers and hands are bruised right now and the thought of doing another 3 corsages and 1 bout is just too much work right now. Anyways, I'll be posting photos as soon as I get them off my camera.
So for the bridesmaids' bouquest, I used:
- 3 cream gerbera daisies
- one bit hydrangea ball that came with three big leaves
- 4 lavender roses
- floral tape
- floral wire
- ivory ribbon
The first thing I did was pull the leaves off the hydrangea stem and using floral tape, attached them to floral wire. The lavender roses came with two sets of leaves, so I snipped off the ones that were lower on the stem. Those will be used for the bouts. I composed the bouquet and decided to cut the stems about two to three hands' width down from the flower heads. Once the stems are cut, I placed the gerbera daisies into the hydrangea ball and stuck one lavender rose in the middle of the bouquet. With the remaining lavender roses, I bent the heads until they were almost a 90 degree angle, then fitted them to the outside of the bouquet, where there were gaps. They generally ended up against the gerbera daisies. Once that's put together, I wrapped the stems tightly using floral tape. You can tape each stem, one by one, which I did for one of the bouquets, but it takes more time and effort. Once that's nicely wrapped, I fitted the leaves to surround the bouquet and then attached them using floral tape. The last thing to do was wrap the sticky floral tape part in ivory ribbon. I folded the tip down to make a triangle at the end and wrapped the stems going up. Once at the top, I folded the ribbon down again at an angle and wrapped the stems going down. Then I taped the end. I tried to use a corasage pin, but it was too hard to insert.
For my own bouquet, I used:
- 3 hydrangea balls
- 6 lavender lotuses
- and marabou feathers attached to floral wire using floral tape.
I used the same process as the bridesmaids' bouquets. I particularly like the effect of the feathers in the bouquet.
For the bouts, I had to wire the individual blossoms onto floral wire. The groomsmen got one small daisy blossom and two hydrangea blossoms. I used the rose leaves I cut off from before as the backdrop for the flowers. I ended up attaching the blossoms one by one with floral tape. The groom's bout has one larger mini lotus blossom and one smaller mini lotus blossom, 3 hydrangea blossoms and a set of rose leaves. My father's bout is one lavender rose and one set of rose leaves. I have to make another lavender rose bout for my fiance's stepfather.
For the corsages, I'm thinking a lavender rose and two small daisy blossoms with hydrangea blossoms as filler flowers, if needed. I'll need three of these. I'm planning to attach them to navy blue ribbon that they can tie onto their wrists.
Once all this is finished, I'll have some flowers leftover. I'm thinking I can use them in the centerpieces. I'm not sure I'll get around to making centerpieces, but if I have the time, at least I already have some of the supplies. :-)
The absolute hardest part was cutting the stems. I had a wire cutter, but it was difficult to use on the really thick wired stems. I had to draft the help of my fiance in the end, but I did most of them myself. All in all, I think they turned out very nicely. I finished the bridesmaids' bouquets, my bouquet, the groom's bout, the groomsmen's bouts and my father's bout. I still have to do one more bout and the corsages for our moms. So I'm mostly done with the flowers. I thought about also doing corsages and bouts for our siblings, but my fingers and hands are bruised right now and the thought of doing another 3 corsages and 1 bout is just too much work right now. Anyways, I'll be posting photos as soon as I get them off my camera.
So for the bridesmaids' bouquest, I used:
- 3 cream gerbera daisies
- one bit hydrangea ball that came with three big leaves
- 4 lavender roses
- floral tape
- floral wire
- ivory ribbon
The first thing I did was pull the leaves off the hydrangea stem and using floral tape, attached them to floral wire. The lavender roses came with two sets of leaves, so I snipped off the ones that were lower on the stem. Those will be used for the bouts. I composed the bouquet and decided to cut the stems about two to three hands' width down from the flower heads. Once the stems are cut, I placed the gerbera daisies into the hydrangea ball and stuck one lavender rose in the middle of the bouquet. With the remaining lavender roses, I bent the heads until they were almost a 90 degree angle, then fitted them to the outside of the bouquet, where there were gaps. They generally ended up against the gerbera daisies. Once that's put together, I wrapped the stems tightly using floral tape. You can tape each stem, one by one, which I did for one of the bouquets, but it takes more time and effort. Once that's nicely wrapped, I fitted the leaves to surround the bouquet and then attached them using floral tape. The last thing to do was wrap the sticky floral tape part in ivory ribbon. I folded the tip down to make a triangle at the end and wrapped the stems going up. Once at the top, I folded the ribbon down again at an angle and wrapped the stems going down. Then I taped the end. I tried to use a corasage pin, but it was too hard to insert.
For my own bouquet, I used:
- 3 hydrangea balls
- 6 lavender lotuses
- and marabou feathers attached to floral wire using floral tape.
I used the same process as the bridesmaids' bouquets. I particularly like the effect of the feathers in the bouquet.
For the bouts, I had to wire the individual blossoms onto floral wire. The groomsmen got one small daisy blossom and two hydrangea blossoms. I used the rose leaves I cut off from before as the backdrop for the flowers. I ended up attaching the blossoms one by one with floral tape. The groom's bout has one larger mini lotus blossom and one smaller mini lotus blossom, 3 hydrangea blossoms and a set of rose leaves. My father's bout is one lavender rose and one set of rose leaves. I have to make another lavender rose bout for my fiance's stepfather.
For the corsages, I'm thinking a lavender rose and two small daisy blossoms with hydrangea blossoms as filler flowers, if needed. I'll need three of these. I'm planning to attach them to navy blue ribbon that they can tie onto their wrists.
Once all this is finished, I'll have some flowers leftover. I'm thinking I can use them in the centerpieces. I'm not sure I'll get around to making centerpieces, but if I have the time, at least I already have some of the supplies. :-)
Monday, June 21, 2010
Jillian Michaels rocks!
For a while, I was pretty faithful about doing the 30 Day Shred every day with Jillian Michaels, and yes, I was seeing results! Not in terms of weight, but I was getting visible muscle tone in my arms and abs and I was definitely feeling stronger and more fit. Then I got a respiratory infection and was hacking up my lungs every day and night for about two weeks. It's been two weeks since I recovered and I still haven't managed to consistently get back on track. Of course, getting off track for me also meant I lost motivation to watch what I eat and so it was no surprise that I gained all my inches back already.
I decided I really want to do more Jillian Michaels because every review I've read of her DVDs says how much she totally kicks your butt and I admit to having become addicted to an intense workout. It just feels so good, as you're lying on the floor recovering, to know that your ass was beaten down to a sweaty mess! However, after having done almost a month of the 30 Day Shred, I was getting bored of the workouts. I needed some variety if I was to keep my motivation up. So I decided to try the 30 Day Slimdown program. It involves acquiring two more DVDs: No More Trouble Zones and Banish Fat, Boost Metabolism. I tried the Banish Fat, Boost Metabolism last Friday and I couldn't finish it! Yes, it did feel rather pathetic, but I am looking forward to the day I can say, I did it!
So anyways, I did Day 1 on the program, which starts with Level 1 of the 30 Day Shred and you know what? It felt too easy! Can you believe it? I mean, it was a good sweaty workout and all, but I felt like I could definitely go more intense and push myself harder. This is great! I definitely feel like although I don't feel like I look any better, I still must be improving my fitness to be able to feel this way. Yay! So today is another segment of Level 1 of the 30 Day Shred, but since it was so easy for me yesterday, I think I'll do a Level 2 today.
Here's the 30 Day Slimdown program schedule:
DAY 1 - 30 DAY SHRED: LEVEL 1
DAY 2 - 30 DAY SHRED: LEVEL 1
DAY 3 - NO MORE TROUBLE ZONES
DAY 4 - 30 DAY SHRED: LEVEL 1
DAY 5 - BANISH FAT, BOOST METABOLISM
DAY 6 - QUICK TROUBLE ZONES
DAY 7 - OFF!
DAY 8 - 30 DAY SHRED: LEVEL 1
DAY 9 - 30 DAY SHRED: LEVEL 2
DAY 10 - QUICK TROUBLE ZONES
DAY 11 - 30 DAY SHRED: LEVEL 2
DAY 12 - BANISH FAST, BOOST METABOLISM
DAY 13 - NO MORE TROUBLE ZONES
DAY 14 - OFF!
DAY 15 - 30 DAY SHRED: LEVEL 1 & QUICK TROUBLE ZONES
DAY 16 - 30 DAY SHRED: LEVEL 2
DAY 17 - NO MORE TROUBLE ZONES
DAY 18 - 30 DAY SHRED: LEVEL 1 & 2
DAY 19 - NO MORE TROUBLE ZONES
DAY 20 - BANISH FAT, BOOST METABOLISM
DAY 21 - OFF!
DAY 22 - 30 DAY SHRED: LEVEL 2 & 1
DAY 23 - QUICK TROUBLE ZONES
DAY 24 - BANISH FAT, BOOST METABOLISM
DAY 25 - QUICK TROUBLE ZONES & 30 DAY SHRED: LEVEL 2
DAY 26 - OFF!
DAY 27 - NO MORE TROUBLE ZONES & 30 DAY SHRED LEVEL 1
DAY 28 - BANISH FAT, BOOST METABOLISM & QUICK TROUBLE ZONES
DAY 29 - 30 DAY SHRED: LEVEL 2 AND THEN LEVEL 1
DAY 30 - NO MORE TROUBLE ZONES
I decided I really want to do more Jillian Michaels because every review I've read of her DVDs says how much she totally kicks your butt and I admit to having become addicted to an intense workout. It just feels so good, as you're lying on the floor recovering, to know that your ass was beaten down to a sweaty mess! However, after having done almost a month of the 30 Day Shred, I was getting bored of the workouts. I needed some variety if I was to keep my motivation up. So I decided to try the 30 Day Slimdown program. It involves acquiring two more DVDs: No More Trouble Zones and Banish Fat, Boost Metabolism. I tried the Banish Fat, Boost Metabolism last Friday and I couldn't finish it! Yes, it did feel rather pathetic, but I am looking forward to the day I can say, I did it!
So anyways, I did Day 1 on the program, which starts with Level 1 of the 30 Day Shred and you know what? It felt too easy! Can you believe it? I mean, it was a good sweaty workout and all, but I felt like I could definitely go more intense and push myself harder. This is great! I definitely feel like although I don't feel like I look any better, I still must be improving my fitness to be able to feel this way. Yay! So today is another segment of Level 1 of the 30 Day Shred, but since it was so easy for me yesterday, I think I'll do a Level 2 today.
Here's the 30 Day Slimdown program schedule:
DAY 1 - 30 DAY SHRED: LEVEL 1
DAY 2 - 30 DAY SHRED: LEVEL 1
DAY 3 - NO MORE TROUBLE ZONES
DAY 4 - 30 DAY SHRED: LEVEL 1
DAY 5 - BANISH FAT, BOOST METABOLISM
DAY 6 - QUICK TROUBLE ZONES
DAY 7 - OFF!
DAY 8 - 30 DAY SHRED: LEVEL 1
DAY 9 - 30 DAY SHRED: LEVEL 2
DAY 10 - QUICK TROUBLE ZONES
DAY 11 - 30 DAY SHRED: LEVEL 2
DAY 12 - BANISH FAST, BOOST METABOLISM
DAY 13 - NO MORE TROUBLE ZONES
DAY 14 - OFF!
DAY 15 - 30 DAY SHRED: LEVEL 1 & QUICK TROUBLE ZONES
DAY 16 - 30 DAY SHRED: LEVEL 2
DAY 17 - NO MORE TROUBLE ZONES
DAY 18 - 30 DAY SHRED: LEVEL 1 & 2
DAY 19 - NO MORE TROUBLE ZONES
DAY 20 - BANISH FAT, BOOST METABOLISM
DAY 21 - OFF!
DAY 22 - 30 DAY SHRED: LEVEL 2 & 1
DAY 23 - QUICK TROUBLE ZONES
DAY 24 - BANISH FAT, BOOST METABOLISM
DAY 25 - QUICK TROUBLE ZONES & 30 DAY SHRED: LEVEL 2
DAY 26 - OFF!
DAY 27 - NO MORE TROUBLE ZONES & 30 DAY SHRED LEVEL 1
DAY 28 - BANISH FAT, BOOST METABOLISM & QUICK TROUBLE ZONES
DAY 29 - 30 DAY SHRED: LEVEL 2 AND THEN LEVEL 1
DAY 30 - NO MORE TROUBLE ZONES
Friday, June 11, 2010
DIY Cupcake dome and tree
Somehow, I've accumulated a lot of those small soup take-out containers. Apparently, they make great cupcake domes and can be hung or stacked into cupcake tree! That is sooo cool!
http://giverslog.com/?p=7787
A different kind of rice sock
It's really a heating pad filled with rice, but when I saw this, I thought, "rice sock!" There's a bit of sewing involved, but basically, you're taking a big, long pocket and sewing segments into it. Then you fill the pockets with rice. It's just like the rice sock, only a different way of doing it and more work.
http://www.thegreenwife.com/frommetoyou/tutorials/heating-pad-tutorial/
Postcarden
I totally love this! I would put one on my desk if I could but unfortunately, they don't ship to the U.S.!
http://postcarden.com/
Thursday, June 10, 2010
Coffee table that shreds your paper
Is it weird that I kinda like this? We already have a shredder, but this is just so cool to me! I love furniture that multitasks and if I don't like the white color, I can always paint over it.
http://www.designspongeonline.com/2010/06/thanks-for-shredding-my-paper-coffee-table.html
Wednesday, June 9, 2010
Qipao
I finally bought the fabric for my qipao, or chinese dress. Before I got engaged, I thought for sure I would get something purple with little dogwood or cherry blossoms on it. As I kept looking at fabric, I decided to stick with the traditional "big red" color. I thought about going extra traditional and getting a phoenix and dragon pattern on it, but in the end, I got something with butterflies on it, which I think is more me.
I'm not particularly big on traditions, but my wedding day is probably the only day I can get away with wearing a bright red qipao without looking like a restaurant hostess. Damn those kitschy chinese restaurants and tea shops! It really sux that they've totally ruined the dress for Asians who want to enjoy wearing it. Maybe I should just start wearing the dress around town to nice restaurants to break that image? Lol! It would be a great excuse to wear it whenever I want, but it would be super irritating if people ask me to seat them.
Anyways, while I was in the shop buying brocade fabric for my dress, I couldn't resist buying some other brocade fabrics. I LOVE chinese brocade as much as I LOVE japanese chirimen crepe fabrics! Not sure what I'll do with the extra fabric yet, but I'm definitely going to try and save them for something special!
I'm not particularly big on traditions, but my wedding day is probably the only day I can get away with wearing a bright red qipao without looking like a restaurant hostess. Damn those kitschy chinese restaurants and tea shops! It really sux that they've totally ruined the dress for Asians who want to enjoy wearing it. Maybe I should just start wearing the dress around town to nice restaurants to break that image? Lol! It would be a great excuse to wear it whenever I want, but it would be super irritating if people ask me to seat them.
Anyways, while I was in the shop buying brocade fabric for my dress, I couldn't resist buying some other brocade fabrics. I LOVE chinese brocade as much as I LOVE japanese chirimen crepe fabrics! Not sure what I'll do with the extra fabric yet, but I'm definitely going to try and save them for something special!
Thursday, May 27, 2010
Garter and Bouquet toss
Every wedding I have ever been to has done the garter and bouquet toss. For mine, I thought about cutting the event out for a couple of reasons. First, I want to keep my bouquet. Second, I want to keep things simple and the less events, the more simple. Lol! Third, I'd have to make myself a garter.
I wavered between doing it and not doing over the past few months. My fiance doesn't seem to care either way though if we do it, he seems certain that he's supposed to take my garter off with his teeth and I'm pretty certain that he's not. Lol! Anyways, if we do it, it means I'll need to create a toss bouquet and garter. That's two extra tasks to do. As simple as I want to make things on myself, the things that are keeping me from cutting the event is my love of crafty projects and my love of accessories. What can I say? I am a child of our consumerist culture and I just love things! Especially pretty, girly things!
So in considering making the toss bouquet, I had come to a few conclusions. First, the toss bouquet won't be a duplicate of my own bouquet because I didn't order flowers for it and didn't want to spend more money on flowers for it. That means the toss bouquet will be a completely different bouquet. If I don't end up using all the flowers I ordered, I'll make the toss bouquet out of the leftover flowers. So helping to decide whether or not I want to do the event will be if I have any or enough flowers leftover to make a toss bouquet.
As for the garter, that's easy. I have enough scrap fabric to make a garter. I can also use the extra lace cut from my wedding gown. Or I can buy some lace edging from a fabric store for pretty cheap. Lots of options. I'm not worried here. Lol!
So I'm hoping to drop by my parent's place this weekend to pick up the rest of the flowers I had shipped there. Once I have all my materials, I'll be making the bouquets, corsages and bouts. Then it's all about the centerpieces. Oh wait, I haven't finished the invitations!
Shoot! That has to take priority cause they gotta go out in a few weeks! Lol!
I wavered between doing it and not doing over the past few months. My fiance doesn't seem to care either way though if we do it, he seems certain that he's supposed to take my garter off with his teeth and I'm pretty certain that he's not. Lol! Anyways, if we do it, it means I'll need to create a toss bouquet and garter. That's two extra tasks to do. As simple as I want to make things on myself, the things that are keeping me from cutting the event is my love of crafty projects and my love of accessories. What can I say? I am a child of our consumerist culture and I just love things! Especially pretty, girly things!
So in considering making the toss bouquet, I had come to a few conclusions. First, the toss bouquet won't be a duplicate of my own bouquet because I didn't order flowers for it and didn't want to spend more money on flowers for it. That means the toss bouquet will be a completely different bouquet. If I don't end up using all the flowers I ordered, I'll make the toss bouquet out of the leftover flowers. So helping to decide whether or not I want to do the event will be if I have any or enough flowers leftover to make a toss bouquet.
As for the garter, that's easy. I have enough scrap fabric to make a garter. I can also use the extra lace cut from my wedding gown. Or I can buy some lace edging from a fabric store for pretty cheap. Lots of options. I'm not worried here. Lol!
So I'm hoping to drop by my parent's place this weekend to pick up the rest of the flowers I had shipped there. Once I have all my materials, I'll be making the bouquets, corsages and bouts. Then it's all about the centerpieces. Oh wait, I haven't finished the invitations!
Shoot! That has to take priority cause they gotta go out in a few weeks! Lol!
Thursday, May 13, 2010
Casserole
I never made a casserole until I left my parents' place. Even then, I made it rarely. Lately, I've discovered that it is a great way to get rid of leftovers and other bits of food left in the fridge! It's also great cause it's an all-in-one meal.
My latest attempted included one small box of frozen spinach, some seitan cubes I had in the fridge, cooked rice, leftover onion and leftover veggie broth and some smoked gouda cheese that needed to be used up. I sliced and diced the seitan cubes and onion. For the veggie broth, I made a roux of butter and flour and added it to the broth to thicken into a creamy sauce/gravy. After I grated the cheese, I tossed everything together with some seasonings and an egg and baked it in the oven for about 45 to 50 minutes at 350 degress F. Then I sprinkled a little more cheese and bread crumbs on top and baked it for another 10 to 15 minutes. Gouda doesn't make for the best topping, but it was what was on hand. It actually turned out pretty yummy!
As a reference, I used this site to help me make my casserole:
http://lancaster.unl.edu/food/ciqi.shtml
My latest attempted included one small box of frozen spinach, some seitan cubes I had in the fridge, cooked rice, leftover onion and leftover veggie broth and some smoked gouda cheese that needed to be used up. I sliced and diced the seitan cubes and onion. For the veggie broth, I made a roux of butter and flour and added it to the broth to thicken into a creamy sauce/gravy. After I grated the cheese, I tossed everything together with some seasonings and an egg and baked it in the oven for about 45 to 50 minutes at 350 degress F. Then I sprinkled a little more cheese and bread crumbs on top and baked it for another 10 to 15 minutes. Gouda doesn't make for the best topping, but it was what was on hand. It actually turned out pretty yummy!
As a reference, I used this site to help me make my casserole:
http://lancaster.unl.edu/food/ciqi.shtml
Salads
I have never been a big fan of salads. If I can have something else, I'll usually not opt for a salad. That said, there are some really delicious salads out there! Whole Foods has this awesome mesclun salad that comes with medallions of goat cheese, cranberries and walnuts with a balsamic vinaigrette. I don't usually use the dressing as the cheese and cranberries and walnuts pack a mighty big flavor already, but I'll dip some leaves in it every so often. If you can get your hands on it, or if you can make your own, it's well worth it!
Another salad I love is the iceberg wedge from Mermaid Inn. I absolutely love their lobster sandwich, which I no longer indulge in. Now the only thing I can have there is their delicious iceberg wedge. It's a quarter of a small head of iceberg lettuce with a deliciously flavorful, thin blue cheese dressing drizzled on top. It's not really a meal, but I always come out feeling rather satisfied when I'm done.
On my own lately, I've been packing my own favorite version of salad. It's not low fat, but it satisfies me when I want to feel like I'm being good by eating a salad. It's got baby spinach, avocado, pepperjack cheese, tomatoes and carrots. There's no dressing as it depends mostly on the avocado and pepperjack for flavor. I rather prefer it without the dressing. So here's the recipe below:
1 cup baby spinach
1 medium carrot, cut into little match sticks or sliced into thin rounds
1 quarter of a tomato, sliced very thin
1 cubic inch of pepperjack cheese, sliced thin
1/2 of a small avocado
Toss the spinach, carrot and tomato together and top with cheese. I then spoon the avocado out of the shell and place the spoonfuls around the top of the salad. That's pretty much it. If you're even lazier, just put everything in a big bowl, cover and shake it around. That's it!
Another salad I love is the iceberg wedge from Mermaid Inn. I absolutely love their lobster sandwich, which I no longer indulge in. Now the only thing I can have there is their delicious iceberg wedge. It's a quarter of a small head of iceberg lettuce with a deliciously flavorful, thin blue cheese dressing drizzled on top. It's not really a meal, but I always come out feeling rather satisfied when I'm done.
On my own lately, I've been packing my own favorite version of salad. It's not low fat, but it satisfies me when I want to feel like I'm being good by eating a salad. It's got baby spinach, avocado, pepperjack cheese, tomatoes and carrots. There's no dressing as it depends mostly on the avocado and pepperjack for flavor. I rather prefer it without the dressing. So here's the recipe below:
1 cup baby spinach
1 medium carrot, cut into little match sticks or sliced into thin rounds
1 quarter of a tomato, sliced very thin
1 cubic inch of pepperjack cheese, sliced thin
1/2 of a small avocado
Toss the spinach, carrot and tomato together and top with cheese. I then spoon the avocado out of the shell and place the spoonfuls around the top of the salad. That's pretty much it. If you're even lazier, just put everything in a big bowl, cover and shake it around. That's it!
Thursday, April 29, 2010
Let's talk about flowers
I decided long ago that I wanted fake flowers. I didn't want to spend a thousand or two at a florist on flowers that were going to die. I also didn't have the resources to order fresh flowers online, store them in my fridge and then tie them into bouquets right before the wedding. Using fake flowers, I get to keep my wedding bouquet indefinitely, I get to make them way ahead of time and not worry about them and I can get flowers from any season.
I played around with the idea of making ribbon flowers, or just sewing fabric into ruffles and using that as a bouquet. Crepe paper flowers were also attractive and there are books you can download online that can teach you how to make different crepe paper flowers. Both ribbon and paper flowers can be quite pretty. They both also require a lot more work than I'm willing to put out these days.
Lately, I've been feeling exhausted. There are too many demands on my time and energy right now and there are always tasks in the back of my mind nagging me that I need to check off. It's hard to concentrate on any one thing when there are so many directions you're being pulled at once.
So anyways, back to the flowers. I definitely wanted daisies. Chaucer said that the daisy was the flower of true love because the yellow center represented happiness and warmth like the warmth of the sun, and the white petals represented purity, truth and innocence, free from guile. The popular red rose, he said, was false love and represented lust, and not true love. That is why I've always had a thing for daisies.
I also love lotuses. Not only are they pretty, but in buddhist culture, the lotus is revered for growing in the dirtiest of waters and still blooms clean. Unfortunately, they are not as popular a flower and thus, they are harder to find as silk flowers. Roses are everywhere and you can usually find hydrangeas as well. I specifically wanted lavender lotuses, but most of the ones I found weren't the right shade.
So I ordered cream gerbera daisies for my bridesmaids and little white daisies for the bouts. I'm also ordering lavender roses as filler flowers for the daisy bouquets and the bouts. I'm not sure I'll be using any filler flowers in my own bouquet. I supposed we'll see once the flowers all come in. The truth is, fake flowers are not necessarily cheaper than real ones, but I'm paying for the convenience of putting them together way ahead of time.
All in all, I have to make one bridal bouquet, a smaller toss bouquet, 4 bridesmaids bouquets, the groom's bout, 2 groomsmen bouts, 2 mommy corsages and 2 daddy bouts. So that's a total of 6 bouquets, 5 bouts and 2 corsages. If I have any time and resources left over, I'll make 3 extra corsages for the groom's sisters.
Wow, that's a lot of work! Lol!
I played around with the idea of making ribbon flowers, or just sewing fabric into ruffles and using that as a bouquet. Crepe paper flowers were also attractive and there are books you can download online that can teach you how to make different crepe paper flowers. Both ribbon and paper flowers can be quite pretty. They both also require a lot more work than I'm willing to put out these days.
Lately, I've been feeling exhausted. There are too many demands on my time and energy right now and there are always tasks in the back of my mind nagging me that I need to check off. It's hard to concentrate on any one thing when there are so many directions you're being pulled at once.
So anyways, back to the flowers. I definitely wanted daisies. Chaucer said that the daisy was the flower of true love because the yellow center represented happiness and warmth like the warmth of the sun, and the white petals represented purity, truth and innocence, free from guile. The popular red rose, he said, was false love and represented lust, and not true love. That is why I've always had a thing for daisies.
I also love lotuses. Not only are they pretty, but in buddhist culture, the lotus is revered for growing in the dirtiest of waters and still blooms clean. Unfortunately, they are not as popular a flower and thus, they are harder to find as silk flowers. Roses are everywhere and you can usually find hydrangeas as well. I specifically wanted lavender lotuses, but most of the ones I found weren't the right shade.
So I ordered cream gerbera daisies for my bridesmaids and little white daisies for the bouts. I'm also ordering lavender roses as filler flowers for the daisy bouquets and the bouts. I'm not sure I'll be using any filler flowers in my own bouquet. I supposed we'll see once the flowers all come in. The truth is, fake flowers are not necessarily cheaper than real ones, but I'm paying for the convenience of putting them together way ahead of time.
All in all, I have to make one bridal bouquet, a smaller toss bouquet, 4 bridesmaids bouquets, the groom's bout, 2 groomsmen bouts, 2 mommy corsages and 2 daddy bouts. So that's a total of 6 bouquets, 5 bouts and 2 corsages. If I have any time and resources left over, I'll make 3 extra corsages for the groom's sisters.
Wow, that's a lot of work! Lol!
Monday, April 26, 2010
Save the Date emails
So I finally got my rear in gear and sent out my Save-The-Date emails. It was a pain the butt getting the guest list together mainly because my better half wasn't very good about getting his list together right. The good news is that that is all in the past now! It's done!
The Save-The-Date emails were great because they forced us to get that guest list together. In turn, getting that guest list together and having to actually send something out based on it, brought a lot of questions to mind.
The first question was, do we send everyone we have an email address for a STD email? The answer was ultimately no. Some guests, like my grandmother, do not have email addresses. Some guests already know the date and are bad with emails. Some guests, we're still not sure we want to invite, and for some guests, we're only inviting part of a group and want to minimize talk by giving them less time to talk about who in the group is invited and who is not.
The second question that came up was how to address people. My feeling, after reading lots of wedding websites, was to address married couples as "Mr. and Mrs. John Doe." If Mr. and Mrs. Doe has children who are invited, it was, "Mr. and Mrs. John Doe and Family." Singles were addressed as "Ms. Jane Doe and Guest" or "Mr. John Doe and Guest, though we left off the "Guest" part for the STDs.
I'm thinking now, for the invitations, keeping it less formal when I know the names of both parties in couples. It feels weird when I know a couple as John and Jane and addressing them as Mr. and Mrs. John Doe, as if the woman doesn't deserve mention. I know I'm being a bit sensitive here, but it does irk me ever so slightly.
Anyways, I'm glad this task has finally been checked off my list! Yay!
The Save-The-Date emails were great because they forced us to get that guest list together. In turn, getting that guest list together and having to actually send something out based on it, brought a lot of questions to mind.
The first question was, do we send everyone we have an email address for a STD email? The answer was ultimately no. Some guests, like my grandmother, do not have email addresses. Some guests already know the date and are bad with emails. Some guests, we're still not sure we want to invite, and for some guests, we're only inviting part of a group and want to minimize talk by giving them less time to talk about who in the group is invited and who is not.
The second question that came up was how to address people. My feeling, after reading lots of wedding websites, was to address married couples as "Mr. and Mrs. John Doe." If Mr. and Mrs. Doe has children who are invited, it was, "Mr. and Mrs. John Doe and Family." Singles were addressed as "Ms. Jane Doe and Guest" or "Mr. John Doe and Guest, though we left off the "Guest" part for the STDs.
I'm thinking now, for the invitations, keeping it less formal when I know the names of both parties in couples. It feels weird when I know a couple as John and Jane and addressing them as Mr. and Mrs. John Doe, as if the woman doesn't deserve mention. I know I'm being a bit sensitive here, but it does irk me ever so slightly.
Anyways, I'm glad this task has finally been checked off my list! Yay!
Thursday, April 15, 2010
Make your own reusable ice pack
I had no idea it could be done this way.
http://www.thekitchn.com/thekitchn/how-to/how-to-make-your-own-lunch-box-ice-packs-113998
Sunday, April 4, 2010
My first seder at home
The very first seder I have ever attended was at my fiance's grandmother's apartment last year. This year, we had our own little seder dinner in our own apartment. It is the first seder where my fiance played "leader" and it is the first seder I have ever hosted and cooked for. It was fun!
It was not a traditional seder, but it was a seder nonetheless. We bought an apple, walnuts, eggs, horseradish root, Kedem kosher wine and Haggadahs all in preparation for this night. My fiance had already started on a box of matzoh this week, so we were good on the matzoh. We used his grandmother's crystal for our wine glasses and had his grandmother's seder plate on display. I helped to cook the food and I have to say that everything turned out very delicious!
The charoset was made with one very sweet green apple, a handful of walnuts, a splash of lemon juice and some kosher wine. It's a basic recipe and turned out very yummy! Everything was pulsed into a fine pulp in the food processor. I didn't measure everything out but I made sure I only used about a teaspoon to a tablespoon of lemon juice and enough kosher wine that it sweetened and moistened everything, but didn't cover up the taste of the apples and lemon.
I also roasted a hard boiled egg in the toaster oven to make the beitzah. I probably should have poked a few holes in the shell before I put it in the oven because it cracked dramatically while roasting! My fiance didn't mind it, saying that in his family, they don't eat the egg so it doesn't matter that it cracked. Well, since I would rather not waste food, once the seder was over, I ate the egg. Lol! There was a slightly smoky flavor to the egg and it was delicious in the salt water.
As for the bitter herb, we used horseradish. It was a big root and we only needed a little for the seder. So after my fiance cut out the portion he wanted to use, I made the rest into prepared horseradish to put into our mashed potatoes. It's actually very easy! After you skin the root, cut it up into pieces and pulse in the food processor until fine. Because fresh horseradish can make your eyes burn and make you really, really uncomfortable, you should grind horseradish outside or near an open window with a fan blowing. Our root was rather old and not very strong, so we just did it near the window. Once you have the horseradish ground fine, add enough vinegar to coat and a tiny pinch of sea salt to taste. It tasted wonderful! I don't think I'll ever have the store-bought stuff and be satisfied anymore! We did put a little of the prepared horseradish on the plate with the bitter herb for the hillel sandwich.
So then we sat with our haggadahs and did our very own seder. For the festive meal, we were so stuffed already, we just had some horseradish mashed potatoes. Basically mashed potatoes flavored with the fresh prepared horseradish I made earlier. It was so good, we stuffed ourselves on it and couldn't eat anything else for the meal! After the seder was over and everything washed and put away, we still had a lot of leftover matzoh.
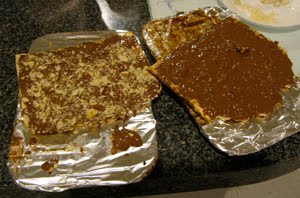
So I made some chocolate-covered matzoh! The method is very simple. Wrap an oven rack in foil and preheat the oven to 375 degrees F. Then take equal amounts of butter and brown sugar and boil it for three minutes in a saucepan, stirring constantly. Pour it over the matzoh and spread to coat. Then place the matzoh in the oven and reduce the heat to 350 degrees F. Keep an eye on the matzoh to make sure it doesn't burn. If it starts to burn, reduce the heat to 325 degrees F. and you can take the matzoh out for a bit to cool it down a little. Bubbling is okay though. Bake for about 15 minutes. Meanwhile, chop up some Toblerone chocolate, or whatever chocolate you have on hand, or use semisweet chocolate chips. Once the 15 minutes are up, take the matzoh out of the oven and spread the chocolate out on it. Wait a few minutes and begin spreading the melted chocolate to coat. Allow the matzoh to cool completely before enjoying. We actually ate half the matzoh before the chocolate cooled completely. Lol! It was soooooooo delicious!
It was not a traditional seder, but it was a seder nonetheless. We bought an apple, walnuts, eggs, horseradish root, Kedem kosher wine and Haggadahs all in preparation for this night. My fiance had already started on a box of matzoh this week, so we were good on the matzoh. We used his grandmother's crystal for our wine glasses and had his grandmother's seder plate on display. I helped to cook the food and I have to say that everything turned out very delicious!
The charoset was made with one very sweet green apple, a handful of walnuts, a splash of lemon juice and some kosher wine. It's a basic recipe and turned out very yummy! Everything was pulsed into a fine pulp in the food processor. I didn't measure everything out but I made sure I only used about a teaspoon to a tablespoon of lemon juice and enough kosher wine that it sweetened and moistened everything, but didn't cover up the taste of the apples and lemon.
I also roasted a hard boiled egg in the toaster oven to make the beitzah. I probably should have poked a few holes in the shell before I put it in the oven because it cracked dramatically while roasting! My fiance didn't mind it, saying that in his family, they don't eat the egg so it doesn't matter that it cracked. Well, since I would rather not waste food, once the seder was over, I ate the egg. Lol! There was a slightly smoky flavor to the egg and it was delicious in the salt water.
As for the bitter herb, we used horseradish. It was a big root and we only needed a little for the seder. So after my fiance cut out the portion he wanted to use, I made the rest into prepared horseradish to put into our mashed potatoes. It's actually very easy! After you skin the root, cut it up into pieces and pulse in the food processor until fine. Because fresh horseradish can make your eyes burn and make you really, really uncomfortable, you should grind horseradish outside or near an open window with a fan blowing. Our root was rather old and not very strong, so we just did it near the window. Once you have the horseradish ground fine, add enough vinegar to coat and a tiny pinch of sea salt to taste. It tasted wonderful! I don't think I'll ever have the store-bought stuff and be satisfied anymore! We did put a little of the prepared horseradish on the plate with the bitter herb for the hillel sandwich.
So then we sat with our haggadahs and did our very own seder. For the festive meal, we were so stuffed already, we just had some horseradish mashed potatoes. Basically mashed potatoes flavored with the fresh prepared horseradish I made earlier. It was so good, we stuffed ourselves on it and couldn't eat anything else for the meal! After the seder was over and everything washed and put away, we still had a lot of leftover matzoh.
So I made some chocolate-covered matzoh! The method is very simple. Wrap an oven rack in foil and preheat the oven to 375 degrees F. Then take equal amounts of butter and brown sugar and boil it for three minutes in a saucepan, stirring constantly. Pour it over the matzoh and spread to coat. Then place the matzoh in the oven and reduce the heat to 350 degrees F. Keep an eye on the matzoh to make sure it doesn't burn. If it starts to burn, reduce the heat to 325 degrees F. and you can take the matzoh out for a bit to cool it down a little. Bubbling is okay though. Bake for about 15 minutes. Meanwhile, chop up some Toblerone chocolate, or whatever chocolate you have on hand, or use semisweet chocolate chips. Once the 15 minutes are up, take the matzoh out of the oven and spread the chocolate out on it. Wait a few minutes and begin spreading the melted chocolate to coat. Allow the matzoh to cool completely before enjoying. We actually ate half the matzoh before the chocolate cooled completely. Lol! It was soooooooo delicious!
Friday, March 26, 2010
Sorry for the long silence
Things got really busy and I just never got around to blogging for a while. I'm still busy and tired all the time, but not as much as I was. It's either that, or I've gotten used to being so busy!
Lately, I've been working longer hours at work and have been so busy at work that even though I don't get home very late, I'm bushed! On top of that, I have chorus rehearsal twice a week and it usually ends really late. So when I get home, I only have enough time to crawl into bed, thinking about how I have to get up early for work the next day.
Chorus always takes a lot out of me, but this year, I'm actually trying to practice more at home. That means I'm actually getting more tired practicing for Chorus than in previous semesters. This spring, my group has two big concerts to prepare for, so it's a lot of work. The piece that the director is most concerned about right now is Leonard Bernstein's Chichester Psalms. The first movement is really hard! Not only is it sung in Hebrew (a pretty difficult language to sing in), it's super fast and the measures have 7 beats rather than an even number.
Anyways, I've given my friend her veil and I hope she likes it! I still have pictures to post of it. I also have to make my own veil. My friend wanted hers trimmed to wrist length, but I think for mine, I'm going to make it a little longer and go for fingertip length. Once the veil is done, I can start putting together other projects.
So far I still have to:
- finish making the invitations
- make the hair flower
- make the bouquets and bouts
- make the bridesmaids gifts
- decorate the card box (I got a cardboard gazebo box from Amazon.com)
- sew my chinese dress
- make the centerpieces
I've decided that I'm going to make origami centerpieces. That way, it's easily portable and easily trashable. Making origami centerpieces fulfills the need for centerpieces at the wedding as well as the need to indulge in my love of origami! I remember with great fondness, spending hours folding pieces of paper, following the diagrams of instructions from japanese origami books borrowed from the library. I still buy origami books and instructional stuff when I see one I like, so this is a chance to put the hobby to good use! I'm planning to use some of the diagrams from Oriland.com.
Well, that's all I have to say on that for now.
Lately, I've been working longer hours at work and have been so busy at work that even though I don't get home very late, I'm bushed! On top of that, I have chorus rehearsal twice a week and it usually ends really late. So when I get home, I only have enough time to crawl into bed, thinking about how I have to get up early for work the next day.
Chorus always takes a lot out of me, but this year, I'm actually trying to practice more at home. That means I'm actually getting more tired practicing for Chorus than in previous semesters. This spring, my group has two big concerts to prepare for, so it's a lot of work. The piece that the director is most concerned about right now is Leonard Bernstein's Chichester Psalms. The first movement is really hard! Not only is it sung in Hebrew (a pretty difficult language to sing in), it's super fast and the measures have 7 beats rather than an even number.
Anyways, I've given my friend her veil and I hope she likes it! I still have pictures to post of it. I also have to make my own veil. My friend wanted hers trimmed to wrist length, but I think for mine, I'm going to make it a little longer and go for fingertip length. Once the veil is done, I can start putting together other projects.
So far I still have to:
- finish making the invitations
- make the hair flower
- make the bouquets and bouts
- make the bridesmaids gifts
- decorate the card box (I got a cardboard gazebo box from Amazon.com)
- sew my chinese dress
- make the centerpieces
I've decided that I'm going to make origami centerpieces. That way, it's easily portable and easily trashable. Making origami centerpieces fulfills the need for centerpieces at the wedding as well as the need to indulge in my love of origami! I remember with great fondness, spending hours folding pieces of paper, following the diagrams of instructions from japanese origami books borrowed from the library. I still buy origami books and instructional stuff when I see one I like, so this is a chance to put the hobby to good use! I'm planning to use some of the diagrams from Oriland.com.
Well, that's all I have to say on that for now.
Subscribe to:
Posts (Atom)